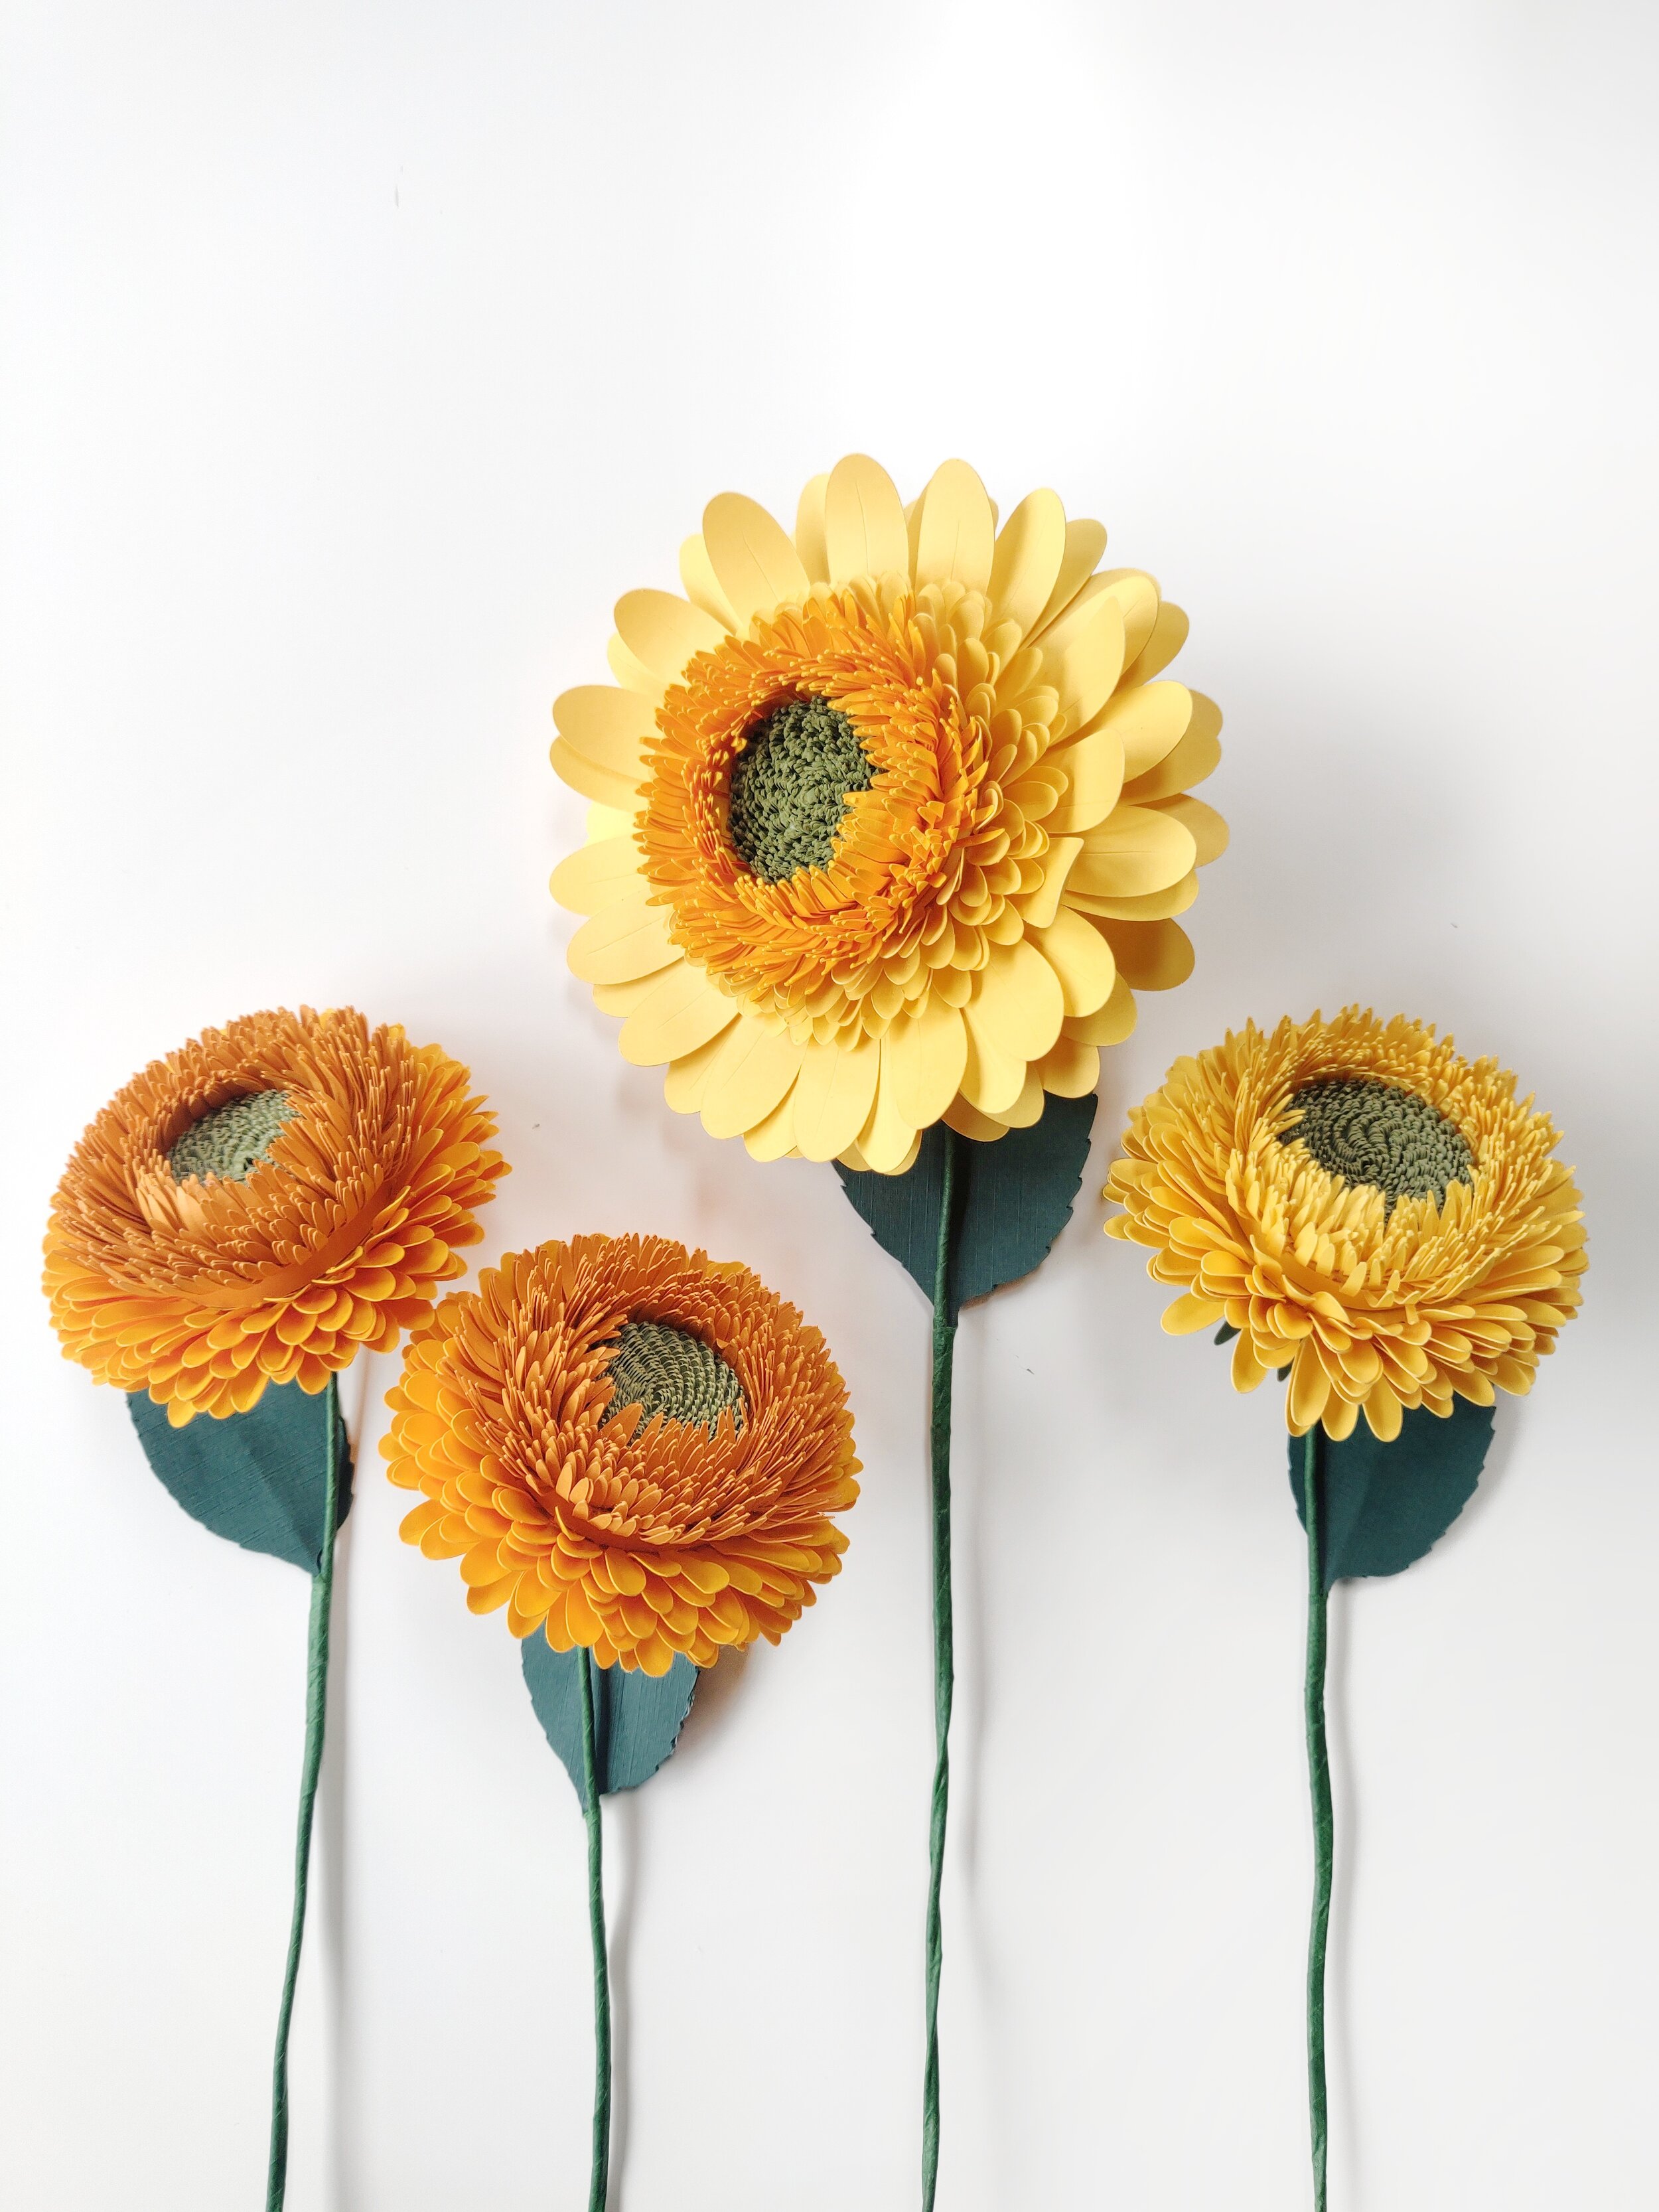
Making a Gerrondo Gerbera - Inspired Paper Daisy

I LOVE daisies. Each daisy is comprised of a composite flower head of several petals surrounding an intricate center disc. They are beautiful and can be found everywhere in a variety of colors, so what is there not to love!
Today, I am revealing all of my secrets about how I designed my beloved gerrondo gerbera paper daisies! It took me several months and lots of retrials to perfect the details I love.
Here’s what you’ll need to create your own:
My Digital Gerbera Paper Daisy Template (On my Etsy)
65lb Cardstock (Here’s what I used and this)
12ga + 18ga floral wire (Here’s what I used)
Cutting machine (Here’s what I use)
Cutting mats (Here’s what I use)
Glue Gun + glue sticks (Here’s a neat value pack)
floral tape (Another neat value back)
pliers
awl
Step-by-Step Paper Daisy Flower Guide
This less-than-5-minute video (below) is easy to follow. It highlights each key step without the lengthy detail. Use this step-by-step guide to follow along, and pause to give yourself enough time to complete each task. If you have any questions shoot me a message!
Let’s start with Petal A
Cut 4 pcs of Petal A using your cutting machine and 65lb cardstock
Use your awl to etch veins into 2 pcs of Petal A (0:10s)
Glue these 2 pcs of Petal A together and curl the edges (0:16s)
Repeat Steps 2 & 3 with the 2 remaining pcs of Petal A (0:25s)
Use your awl to place a hole at the center of a pair of Petal A (0.33)
Cut approximately 10-12 inches of 12ga floral wire, and wrap one end with floral tape
Insert wrapped end of floral wire into the hole (0.36s)
Use your pliers to bend and flatten the edge (0.37s)
Glue your 2nd pair of Petal A to the 1st pair (0:46s)
Now, let’s work with Petal B
Cut 12 pcs of Petal B
Curve and fluff the petals. Layering makes this step easier (0:55s)
Glue Petal B layers together
Glue Petal B glue to Petal A (1:15s)
Next, let’s build the eye-catching center using templates: Center A + Center B. The quantities of each template varies depending on the size of your flower. The quantities below would work for a 5.5” flower.
Cut 14 pcs of Center A and 8 pcs of Center B.
Tightly coil and glue layers of Center B (1:23s)
Coil & glue Center A around Center B (2:08s)
Inwardly curve the edges of the center, and fluff open (2:31s)
Glue the center in place
We are almost done! Let’s complete our stem using the base + leaves
Cut 2 leaves and 1 base
Cut approximately 6 inches of 18ga wire
Wrap with floral tape
Glue the 18ga wire between the 2 leaves (2:45s)
Use your awl to place a hole at the center of the base (3:01s)
Move the base up the floral stem and glue in place (3:05s)
Use the floral tape to attach the leaf to the floral-stem (3:13s)
Voila! Your gerrondo gerbera paper daisy is complete!

Here’s a treat - Many for the price of 1
You can use my gerrondo gerbera paper daisy template to create several styles of daisies. Here are a few fun alternative designs you can try:
Exclude Petal A, and pass the floral stem through the last 2 layers of Petal B. Now you’ll have a gorgeous pom-pom flower!
Re-create the daisy using only one center pattern (Center A or Center B)
